
In fact, it's simple. Look at the scheme:

Okay, it was a joke. So, let's begin.
To sculpt the figure, we need materials :
- FIMO modelling clay.
- Wire. I use brass 0.75 mm, the optimal ratio - quite soft, but it holds the figure good.

... and tools: directly for sculpting - razor (or modeling knife), needle and some nice tool from my wife's manicure set. + tweezers, pliers, etc., as usual:

copper plate to sculpt small details:

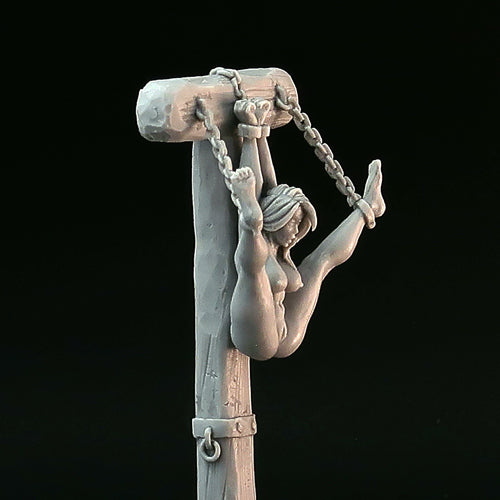
Bend your frame and stifle it in homemade screw clamps. Framework currently does not imply neither head and hands. At this moment it is very important not to be mistaken with the size because the headless torso seems indecently short and he wants to be builded on top.


inflict preliminary volumes and bake. The incisions are needed to the following layers fared better:

at the same time we sculpt a head. Similarly - sculpt "skull", bake it and then and start sculpting the face:

outline the orbits:

Making the nose and refine the form below:

Add chin and refine further: form forehead, nasolabial folds, cheeks, eyebrows :

Lips. Put a little piece of material and share it with a needle into two parts:

Attach lips more or less human form. About lip's form and other issues - is imperative to have (and read!) any book like “Anatomy for artists”. Without it, everything would be meaningless:

It's enough. Smoothing it with oil (brush number 2 + sunflower oil) and send it in the oven. Just like cooking.. Please note - on our head is clearly not enough volume in the neck. This is not a mistake, just we plan to add a helmet later. If you plan to sculpt bald or short haired head, of course, you need to do more anatomically shaped skull.

on the plate we step-by-step sculpt weapons. The dagger :

... and quiver.

Sculpt the body. We always move from the general - to private. That is, first determine volumes and only then move on to the folds and other details.

Specify further. If the belt is pressed into the clothes, as we do, then it may be easier to sculpt it immediately. If it was lying, for example, over the smooth cuirass, I prefer sculpt and bake cuirass first.

Forms are becoming more correct, edges - sharper. Gradually add the details - the folds and cuts. To learn how to behave folds of clothing (again) - you need to read relevant books.

We would like to end, smoothing with oil. Cling dagger that we completed the and baked. Send it all in the oven.

Meanwhile, we take our heads and begin to sculpt a helmet :


Over baked body it's easy and pleasant to sculpt details:

Making bow and quiver and equip our soldier:

Bake base of arm and begin to sculpt it completely:


In the same way adding a second hand and sculpt collar: Set the head.

Completed, enjoy.


Im big fan of historical miniature and sculpt it a lot and for sale and as commission.
Check my shop or contact me for discussion common work.
I will be glad if this tutorial was helpful.
May be you want more? Give me to know in comments!